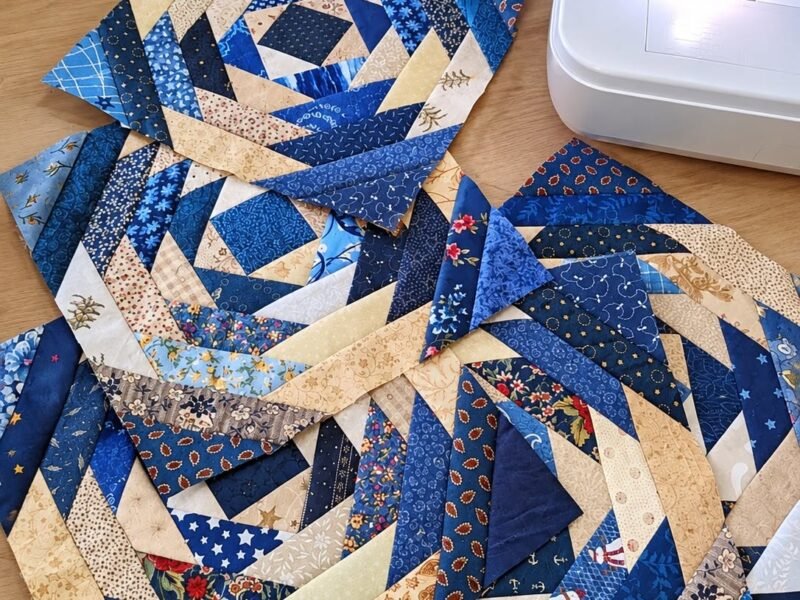
Create a charming blue floral patchwork quilt block using a beautiful combination of blue floral prints, gingham, polka dots, and crisp white fabric. This design brings together different patterns and shades of blue to create a lovely geometric arrangement with a traditional country-style quilting feel.
The combination of light blue, navy blue, and white gives this block a fresh, elegant appearance. It is a wonderful project for quilters who enjoy mixing floral fabrics with simple geometric shapes.
Follow this detailed tutorial to prepare your fabrics, cut the pieces, assemble the patchwork units, and create your own beautiful quilt block.
Materials and Supplies
Before starting, gather the following materials:
- Blue floral cotton fabric in different prints
- Light blue polka dot cotton fabric
- Navy blue polka dot cotton fabric
- Blue and white gingham fabric
- White cotton fabric
- Coordinating blue sewing thread
- Rotary cutter
- Quilting ruler
- Self-healing cutting mat
- Fabric scissors
- Sewing machine
- Pins or fabric clips
- Iron and ironing board
- Quilting ruler or square ruler
Fabric selection tip: Choose at least four different blue prints. Mixing small floral patterns, gingham checks, and polka dots will give your quilt block depth and visual interest. Keep the white fabric as a neutral background to make the blue patterns stand out.
Step 1: Prepare Your Fabrics
Start by washing and drying your cotton fabrics if necessary, especially if you are combining fabrics from different manufacturers.
Press all fabrics thoroughly to remove wrinkles. Smooth fabric makes cutting more accurate and helps prevent uneven seams.
Organize your fabrics into groups:
- Dark blue floral fabric
- Medium blue floral fabric
- Light blue floral fabric
- Blue gingham fabric
- Blue polka dot fabric
- White background fabric
Place the fabrics next to each other before cutting to check that the colors work well together.
Step 2: Cut the Fabric Pieces
For this patchwork design, you will need squares, rectangles, and triangles.
Use a rotary cutter, quilting ruler, and cutting mat to make accurate cuts.
Prepare the following pieces as a starting cutting layout for a small decorative block:
- 9 squares measuring 4½ × 4½ inches for the central patchwork section.
- 4 squares measuring 4½ × 4½ inches in blue gingham for the outer patterned sections.
- 8 squares measuring 4½ × 4½ inches in white cotton for the background and corner sections.
- 8 squares measuring 4½ × 4½ inches in floral prints for additional patterned sections.
The quantities above provide a selection of pieces for the pictured style of block. Arrange them before sewing and adjust the number of pieces according to your chosen finished block size.
Important: All measurements include a ¼-inch seam allowance. If you want to make a larger quilt block, increase the measurements proportionally.
Step 3: Arrange the Central Patchwork
Begin by arranging the nine squares for the center of the design.
Use a combination of floral prints and polka dot fabrics. Place the darkest blue fabric in the middle to create a focal point.
Arrange the remaining squares around it, alternating light and dark fabrics.
The contrast between the white floral fabric and the blue polka dots creates a beautiful checkerboard effect.
Once you are happy with the arrangement, take a photograph of the layout. This will help you remember where each piece belongs during sewing.
Step 4: Sew the Central Squares Together
Take the squares from the first row and place the first two pieces right sides together.
Align the edges carefully and sew using a ¼-inch seam allowance.
Add the third square to complete the row.
Repeat this process for the remaining two rows.
You should now have three separate rows of three squares each.
Press the seam allowances carefully. You can press the seams toward the darker fabrics to reduce the visibility of the seam allowances through lighter fabrics.
Next, place the first and second rows right sides together, matching the seams.
Pin the intersections to keep the squares aligned.
Sew the rows together using a ¼-inch seam allowance.
Attach the third row in the same way.
Press the completed central section carefully. Check that the corners meet neatly and that the seams lie flat.
Step 5: Create the Triangle Units
The triangular sections give the quilt block its distinctive geometric appearance.
For a simple half-square triangle unit, take two fabric squares of equal size. Place one white square and one patterned blue square right sides together.
Draw a diagonal line from one corner to the opposite corner on the back of the lighter fabric.
Sew a straight line ¼ inch away from each side of the marked diagonal line.
Cut directly along the marked diagonal line.
You will now have two half-square triangle units.
Open each unit and press the seam allowance toward the darker fabric.
Trim the units to the required size, making sure their edges are perfectly square.
Repeat this process with the remaining blue and white fabric combinations.
You can use floral, gingham, and polka dot fabrics to create a varied but coordinated design.
Step 6: Assemble the Outer Patterned Sections
Arrange the triangle units around the central patchwork section.
Alternate blue floral triangles with white triangles to create the star-like geometric details visible in the design.
Place the gingham and floral pieces in alternating positions to create additional contrast.
Before sewing, lay all the pieces flat on your work surface.
Pay attention to the direction of the triangles. Their points should face the intended direction to create a balanced geometric pattern.
Sew the triangle units together in pairs, matching the seams carefully.
Continue joining the units until you have completed the four outer sections.
Press each section before moving on to the next step.
Step 7: Add the White Corner Pieces
The white fabric creates contrast around the blue patchwork and gives the design a clean, finished appearance.
Arrange the white triangular pieces along the outer edges of the patterned sections.
Make sure the white areas are evenly distributed around the block.
Pin the pieces in place and sew them together using a ¼-inch seam allowance.
Press the seams gently, taking care not to stretch the bias edges of the triangles.
If necessary, trim the edges so the sections align neatly with the central patchwork.
Step 8: Join All the Sections
Now it is time to bring the entire design together.
Place the central patchwork section on your work surface.
Position the four outer sections around it, checking that the floral and geometric patterns are balanced.
Sew the sections together one at a time.
Match the seam intersections carefully and use pins or clips to prevent the fabric from shifting.
After joining each section, press the seams flat.
Continue until all the sections are connected and the quilt block forms one complete piece.
Step 9: Square Up the Quilt Block
Place the completed patchwork block on your cutting mat.
Use a quilting ruler to check that the edges are straight and the corners are square.
Trim away any small uneven areas, keeping the original design centered.
This step is important because accurately squared quilt blocks are much easier to join when making a larger quilt.
Step 10: Final Pressing and Finishing
Give the entire quilt block a final press using a warm iron suitable for cotton fabric.
Avoid dragging the iron across the fabric, especially around the triangle sections, as this can distort the shape.
Check all the seams to make sure they are secure.
Your blue floral patchwork block is now ready to use!
You can incorporate it into a larger quilt, a decorative table runner, a cushion cover, a wall hanging, or another beautiful quilting project.
Helpful Tips for a Beautiful Result
- Use high-quality quilting cotton for better accuracy and durability.
- Always cut your fabric pieces carefully to maintain consistent dimensions.
- Keep a ¼-inch seam allowance throughout the project.
- Press seams between each sewing stage rather than waiting until the end.
- Use contrasting shades of blue to make the geometric design more noticeable.
- Arrange your fabrics before sewing to avoid placing similar prints next to each other.
- Take your time matching the triangle points and seam intersections.
Final Thoughts
This blue floral patchwork quilt block is a lovely way to combine traditional quilting techniques with fresh, cheerful fabrics. The mixture of navy blue, soft blue, gingham, floral prints, and white creates a timeless design that can complement many different sewing projects.
Once you have mastered this block, experiment with other color combinations, such as pink and sage green, yellow and cream, or lavender and white. Each combination will give the same patchwork style a completely different personality.
Happy quilting!