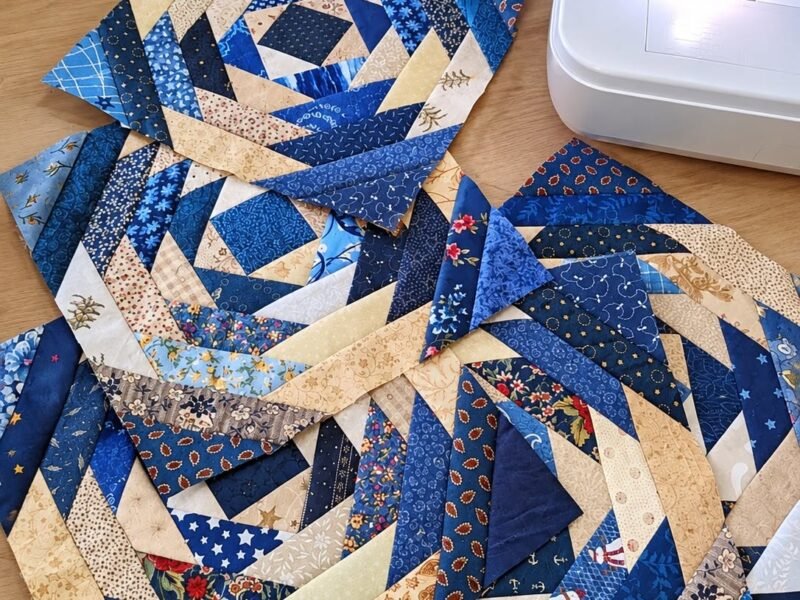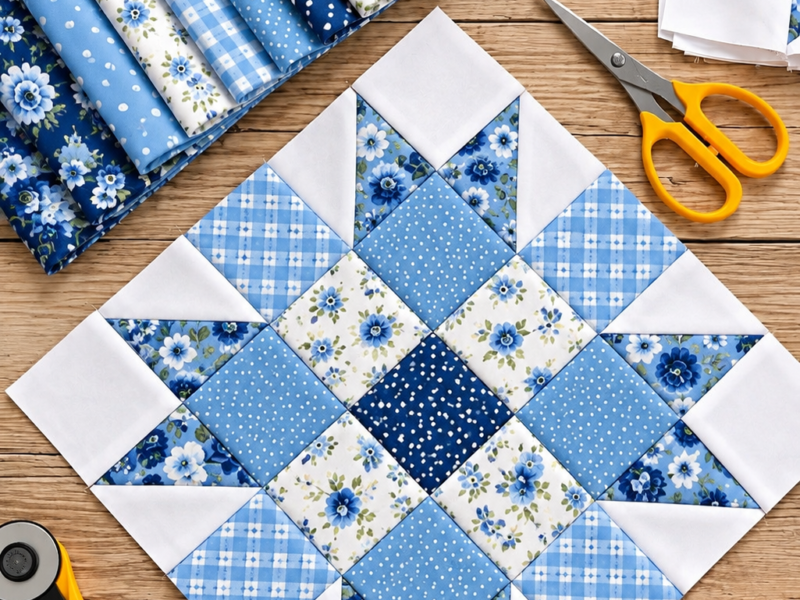
This tutorial will recreate the block in your reference image, with instructions in English, detailed cutting directions, sewing order, and assembly tips.
The design combines white background strips, floral fabric strips, and two colorful star blocks made from red, navy blue, green, and golden yellow fabrics. It has a charming scrappy, cottage-style appearance and is suitable for a wall hanging, table runner, cushion cover, or larger quilt.
The photograph shows a partially assembled patchwork panel. The instructions below reconstruct the visible design; the exact original pattern measurements are not available, so I’ll use a consistent block size to make the project practical to sew.
1. Project overview
Pattern style
Scrappy floral star patchwork
Suggested finished panel
Approximately 12 × 16 inches
Main components
2 star blocks + vertical strips
Seam allowance
¼ inch
Skill level
Confident beginner
2. Materials and fabric selection
White background
Solid white or warm white quilting cotton.
Star fabrics
Red, navy, green, and golden yellow prints.
Floral strips
Small-scale floral cotton prints on a light background.
Fabric requirements
For one panel approximately 12 × 16 inches finished, allow:
| Fabric | Suggested amount | Use |
|---|---|---|
| White cotton | ½ yard | Background and star points |
| Light floral prints | 4–6 fat quarters or scraps | Vertical strips |
| Red print | Scraps | Star sections |
| Navy blue print | Scraps | Star sections |
| Green print | Scraps | Star sections |
| Golden yellow print | Scraps | Star sections |
| Matching thread | 1 spool | Piecing |
| Batting and backing | Optional | Quilting the finished panel |
You can use leftover fabric from previous projects. The variety of prints is part of the charm of this block.
3. Cutting instructions
The reference image contains two colorful star motifs placed diagonally within a panel of vertical strips. To make the construction easier, assemble the stars separately and then join them to the strip-pieced sections.
For this tutorial, each star will measure approximately 6½ inches unfinished and 6 inches finished.
Cut the pieces for two star blocks
| Piece | Quantity for 2 blocks | Cutting size |
|---|---|---|
| White background squares | 8 | 3½ × 3½ in |
| Colored squares | 8 | 3½ × 3½ in |
| Colored center squares | 2 | 2½ × 2½ in |
| White corner triangles | 8 | Cut from 3½-in squares diagonally |
| Extra white strips | As needed | 2½ in wide |
These are starting cuts for a reconstructed block, not measurements verified from the original photograph. The star construction below uses a four-point arrangement, so you may need to trim the assembled units to the stated unfinished size.
Cut the vertical strips
For the surrounding panel, cut strips in varying widths to create the scrappy effect.
| Strip type | Suggested cut |
|---|---|
| White solid | 2½ × 16½ in |
| White solid | 3½ × 16½ in |
| Floral print | 2½ × 16½ in |
| Floral print | 3½ × 16½ in |
| Floral print | 2½ × 12½ in |
| White solid | 2½ × 12½ in |
Cut additional strips in these widths to adjust the layout around the two stars. The reference image uses different strip widths rather than a perfectly repeating arrangement.
4. Make the star blocks
The star motifs are the focal points of the panel. Each one uses four colored sections arranged around the center, with white triangles creating the pointed shapes and contrast.
Step 1 — Choose your colors
For the first star, use:
-
Red floral fabric for one point.
-
Navy blue fabric for another point.
-
Golden yellow fabric for a third point.
-
Green floral fabric for the remaining point.
For the second star, rotate the color placement or swap the fabrics to achieve the scrappy look of the reference image.
Step 2 — Prepare the colored sections
Take the colored squares and mark a diagonal line on the wrong side of each one if you are using a half-square-triangle method.
Place each colored square right sides together with a white square.
Stitch ¼ inch away from each side of the marked diagonal line. Cut along the marked line, open the units, and press the seams toward the darker fabric.
Trim the resulting half-square-triangle units to the size needed for your chosen star layout.
Step 3 — Arrange the points
Lay the colored units on your work surface.
Arrange the red, navy, green, and yellow sections so that their points face outward from the center. Position the white triangles between the colored sections to create the negative-space points visible in the photograph.
Check that the colors form a balanced four-point star before sewing.
Step 4 — Sew the star sections together
Sew the units into rows, matching the seams carefully.
Press the seams in alternating directions where possible to reduce bulk at intersections.
Join the rows together to complete the star block.
Step 5 — Add the center
Sew the center pieces together to create a compact center square, using the colors shown in your preferred arrangement.
Press the completed block and trim it to 6½ inches square.
Repeat these steps for the second star, changing the color order to create variation.
Important: The star in the photograph has a distinctive arrangement of colored arms and white triangular points. If you want a closer match, arrange all pieces on a design board first and check the orientation against the reference image before stitching.
5. Assemble the vertical strip sections
The background consists of long white and floral fabric strips sewn side by side. This technique is often called strip piecing.
Step 1 — Arrange the strips
Lay the strips vertically on a flat surface.
Alternate between white solid fabric and floral prints. Avoid placing two identical floral prints directly next to one another.
Use a variety of widths to reproduce the irregular appearance of the reference image.
Step 2 — Sew the first strips
Place two strips right sides together and sew along their long edges using a ¼-inch seam allowance.
Press the seam toward the darker or more heavily printed fabric.
Step 3 — Continue joining the strips
Add the remaining strips one at a time until you have a panel wide enough to accommodate the two star blocks and the surrounding background.
Press each seam before adding the next strip.
Step 4 — Trim the panel
Square up the strip-pieced panel with a ruler and rotary cutter.
Leave extra fabric around the edges until the star blocks have been positioned and sewn into place.
6. Insert the star blocks into the strip panel
This is the most important part of the assembly process.
Step 1 — Mark the star positions
Place the first star in the upper-right section of the panel.
Place the second star in the lower-left section, matching the diagonal arrangement shown in the reference photograph.
Step 2 — Separate the strip sections
Measure the width and height of each star block. Mark the corresponding area on the strip-pieced panel.
Cut the necessary openings or divide the panel into sections so the stars can be inserted cleanly.
Step 3 — Add white background pieces
Sew white background pieces around the star blocks where necessary to create the rectangular areas visible in the photograph.
Use the same ¼-inch seam allowance and press the seams carefully.
Step 4 — Join the sections
Sew the upper, middle, and lower sections together, aligning the star blocks and vertical strips.
Check that the stars remain diagonally opposite one another and that the vertical strip pattern continues around them.
Step 5 — Square up the panel
Once all sections are joined, press the panel and trim the edges to your desired finished dimensions.
7. Press and finish the patchwork top
-
Press all seams carefully without stretching the fabric.
-
Check the intersections where the white triangles meet the colored star sections.
-
Trim loose threads from both sides.
-
Square the top with a quilting ruler.
-
Measure the finished panel and record its dimensions before adding batting or backing.
8. Optional: Turn the panel into a quilted project
The panel can be used as a decorative piece on its own, or you can turn it into a small quilt.
-
Cut backing fabric and batting at least 2–3 inches larger than the patchwork top on every side.
-
Layer the backing, batting, and patchwork top.
-
Baste the layers with safety pins or temporary adhesive.
-
Quilt along the vertical seams and around the star blocks.
-
Trim the excess batting and backing.
-
Add binding around the perimeter.
For a table runner, make additional strip-pieced sections and repeat the star motif along the length.
9. Final checklist
0 of 6 steps checked
A final note about accuracy: The photograph shows a specific scrappy star arrangement, but it does not reveal all the seam lines or original cutting dimensions. The instructions above provide a workable reconstruction rather than a verified copy of the original pattern. For the closest match, preserve the diagonal placement of the two stars, the alternating vertical floral strips, and the white triangular background pieces.