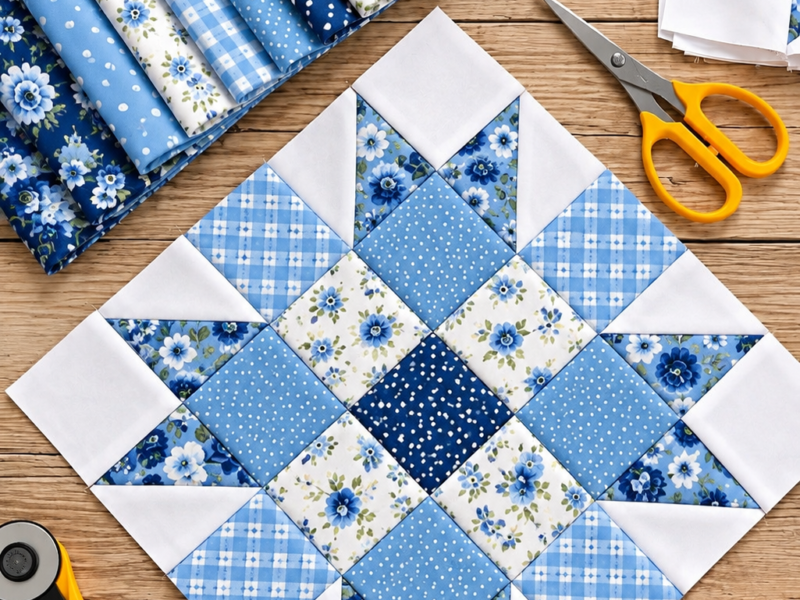
The Crazy Log Cabin quilt block, also known as the Wonky Log Cabin, is a creative variation of the traditional Log Cabin quilting pattern. Unlike the classic version, which uses evenly sized fabric strips arranged in a symmetrical design, this technique embraces irregular shapes, different strip widths, and angled seams to create a unique patchwork composition.
The quilt block shown in the inspiration photo features a beautiful combination of navy blue, royal blue, light blue, cream, and beige fabrics. Different floral, geometric, and decorative prints are combined to create a rich, textured appearance.
This is a wonderful quilting project for anyone who enjoys working with fabric scraps, experimenting with color combinations, and creating one-of-a-kind quilt designs.
In this tutorial, you will learn how to make a Crazy Log Cabin quilt block, prepare your fabrics, sew irregular strips together, trim your finished block, and combine multiple blocks to create a beautiful quilt.
What Is a Crazy Log Cabin Quilt Block?
The Crazy Log Cabin is an improvisational variation of the traditional Log Cabin quilt block.
The traditional Log Cabin design starts with a small center square. Fabric strips are then added around the center in a specific sequence, gradually expanding the block.
The Crazy Log Cabin follows the same general principle but allows much more creative freedom.
Some of its main characteristics include:
- Fabric strips in different widths and lengths.
- Irregular angles and asymmetrical shapes.
- A combination of light and dark fabrics.
- Different patterns and textures.
- An improvised design without strict geometric symmetry.
The result is a dynamic patchwork block with a charming handmade appearance.
Materials You Will Need
Before starting your Crazy Log Cabin quilt block, gather the following supplies:
- 100% cotton quilting fabrics in different colors and prints.
- Fabric scraps in navy blue, royal blue, light blue, beige, and cream.
- Sewing machine.
- Matching sewing thread.
- Rotary cutter.
- Quilting ruler.
- Self-healing cutting mat.
- Fabric scissors.
- Sewing pins or clips.
- Iron and ironing board.
- Square quilting ruler for trimming.
Fabric selection tip: Choose fabrics that share a coordinated color palette but feature different prints. Combining floral, geometric, small-scale, and solid fabrics will give your finished block more depth and visual interest.
Step 1: Choose and Prepare Your Fabrics
Start by sorting your quilting fabrics according to color.
To recreate the look of the inspiration block, consider using three main color groups:
Dark blues: Navy blue, deep blue, and dark indigo fabrics will add contrast and visual depth.
Medium and light blues: Royal blue, sky blue, and printed blue fabrics will bring movement and brightness to the design.
Neutral fabrics: Beige, cream, ivory, and sand-colored fabrics will balance the darker shades.
Cut your fabrics into strips of different widths.
A good starting point is to cut strips between 1¼ and 2½ inches wide, with lengths ranging from 4 to 10 inches.
You do not need to make every strip identical. One of the most appealing features of the Crazy Log Cabin technique is its irregular construction.
Prepare plenty of fabric strips before beginning so you can experiment with different combinations as you sew.
Step 2: Create the Center of Your Block
Choose a small square of fabric to serve as the starting point of your composition.
A 2 x 2-inch square works well for a block measuring approximately 12 x 12 inches.
You can use navy blue, cream, or any contrasting fabric that complements your chosen color palette.
Place the center square on your work surface and select your first fabric strip.
Unlike traditional Log Cabin blocks, you do not need to follow a perfectly symmetrical arrangement. The goal is to create an interesting, improvised design.
Step 3: Sew the First Fabric Strip
Choose a fabric strip approximately 2 inches wide.
Place it along one side of your center square, with the right sides of the fabrics facing each other.
Align the edges and sew using a ¼-inch seam allowance.
Open the strip and press the seam with your iron.
Trim any excess fabric if necessary.
At this stage, your block will begin to resemble a small traditional Log Cabin design, but you will gradually introduce irregular angles and different fabric shapes.
Step 4: Add More Strips at Different Angles
Now comes the creative part!
Choose another fabric strip and position it next to the previous piece.
Instead of keeping every strip perfectly parallel, experiment with slightly angled placements.
Sew the new strip, open it, and press the seam.
Continue adding strips around the growing composition.
Try alternating:
- Narrow and wide fabric strips.
- Light and dark colors.
- Floral and geometric prints.
- Solid fabrics and patterned fabrics.
- Straight edges and angled pieces.
Remember that the Crazy Log Cabin technique does not require perfect symmetry.
Allow the fabric pieces to create unexpected shapes and interesting visual movement.
Step 5: Experiment with Irregular Shapes
To achieve the artistic appearance of the inspiration photo, do not limit yourself to rectangular strips.
You can also incorporate triangles, trapezoids, and irregular quadrilaterals.
One simple technique is to cut the end of a fabric strip diagonally before sewing it to the block.
Another option is to sew a strip onto a larger fabric piece and trim the entire section at a different angle afterward.
These techniques create diagonal lines and give the quilt block its characteristic improvisational look.
Important tip: Always make sure that the fabric underneath provides enough coverage for the area you want to fill. When working with angled pieces, check the composition before sewing to avoid unwanted gaps.
Step 6: Continue Building Your Quilt Block
Keep adding fabric strips until your block reaches the desired size.
A helpful approach is to alternate between different sides of the composition.
For example:
- Add a strip to the top section.
- Attach another piece to the right side.
- Expand the bottom section.
- Add fabric to the left side.
- Continue filling the remaining areas with different shapes and colors.
There is no mandatory order for adding the fabrics.
Step back occasionally and look at the overall composition.
If one section becomes too dark, introduce a cream or light blue fabric to create contrast.
Try to distribute the different colors throughout the block rather than concentrating all the dark fabrics in one area.
Step 7: Trim Your Finished Quilt Block
Once your composition is large enough, it is time to trim the edges.
Place the block on your cutting mat and use a quilting ruler to determine the final dimensions.
For example, if you want a finished block measuring 12 x 12 inches, make sure your patchwork composition is slightly larger before trimming.
Position your ruler carefully and use a rotary cutter to remove the excess fabric.
This step is especially important if you plan to join multiple Crazy Log Cabin blocks together.
Keeping all your blocks the same size will make assembling your quilt much easier.
Step 8: Press and Check Your Seams
After trimming, press the entire block with a warm iron.
You can press the seams to one side or open them, depending on the thickness of your fabrics and your preferred quilting method.
Check the block for loose threads, unfinished seams, or areas where the fabric may have shifted during sewing.
A well-pressed quilt block will look neater and be easier to work with during the next stages of your quilting project.
Color Combination Ideas for a Crazy Log Cabin Quilt
One of the best things about the Crazy Log Cabin pattern is how easily it adapts to different color schemes.
The inspiration photo uses a beautiful combination of blue and neutral fabrics.
Here are some ideas for recreating a similar look:
| Fabric Color | Purpose in the Design |
|---|---|
| Navy blue | Adds depth and contrast |
| Royal blue | Highlights individual sections |
| Light blue | Creates softness and movement |
| Beige | Balances darker colors |
| Cream | Adds brightness |
| Floral prints | Introduce decorative details |
Try combining small floral prints, polka dots, geometric patterns, paisleys, and solid fabrics.
Avoid placing fabrics with very similar prints directly next to each other whenever possible. This will help each strip stand out.
How to Join Multiple Crazy Log Cabin Blocks into a Quilt
Once you have completed several blocks, you can combine them to create a larger patchwork project.
Crazy Log Cabin blocks are versatile and can be used for:
- Bed quilts.
- Decorative throws.
- Wall hangings.
- Table runners.
- Cushion covers.
- Quilted bags.
- Table toppers.
To assemble a quilt, make sure all your blocks have the same finished dimensions.
Arrange them on a large flat surface and experiment with different placements until you find a color arrangement you like.
Sew the blocks together using a ¼-inch seam allowance.
Once the quilt top is complete, prepare your quilt sandwich with three layers:
- The finished patchwork quilt top.
- Batting.
- The backing fabric.
Use your preferred quilting technique to secure the three layers together, then finish the edges with binding.
Helpful Tips for Better Crazy Log Cabin Quilt Blocks
Even though this is an improvisational quilting technique, a few simple practices can make a big difference in your finished project.
Avoid extremely narrow strips: Very thin pieces can be difficult to sew and may create excessive bulk where several seams meet.
Press frequently: Press each new strip after sewing rather than waiting until the block is finished.
Balance your colors: Distribute light and dark fabrics throughout the composition.
Watch for bulky intersections: Avoid allowing too many seams to meet at exactly the same point.
Leave enough fabric for trimming: This is especially important when working with diagonal pieces and irregular shapes.
Enjoy the imperfections: The beauty of the Crazy Log Cabin technique comes from its freedom and creativity. Every block should have its own personality.
Final Thoughts: Why You Should Try the Crazy Log Cabin Quilt Block
The Crazy Log Cabin is a fantastic patchwork technique for quilters who enjoy experimenting with colors, patterns, and fabric scraps.
Its construction allows you to transform leftover pieces of quilting cotton into beautiful and original designs.
No two blocks need to look exactly alike. Even when using the same color palette, different fabric placements, angles, and patterns will produce completely unique results.
The blue and beige version featured in this tutorial is a wonderful example of how different fabrics can work together to create a sophisticated yet cozy handmade quilt.
Whether you are an experienced quilter or someone looking to explore improvisational patchwork for the first time, the Crazy Log Cabin is a rewarding project worth trying.
Gather your favorite fabric scraps, turn on your sewing machine, and start creating your own unique quilt block!