3D Tumbling Blocks Quilt Pattern: Complete Step-by-Step Tutorial
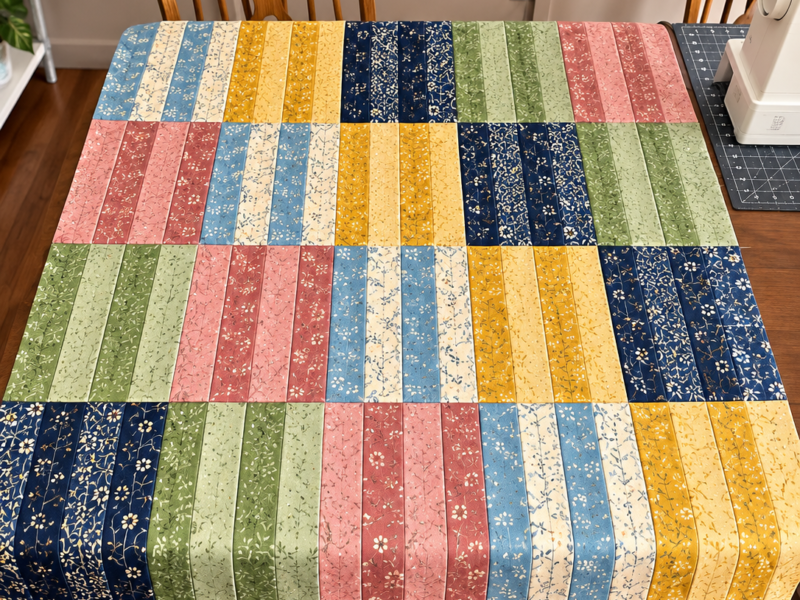
Create a stunning three-dimensional patchwork quilt using colorful fabric scraps and a clever arrangement of diamond-shaped pieces. This traditional quilting design creates the illusion of interlocking cubes, even though the quilt is made entirely from flat pieces of fabric.
With its vintage-inspired prints, soft neutral backgrounds, and contrasting colors, this quilt is a beautiful way to transform leftover quilting cotton into a timeless handmade heirloom.
This tutorial explains how to choose fabrics, cut the diamond pieces, assemble the tumbling blocks, arrange the repeating pattern, and finish the quilt with batting, backing, quilting stitches, and binding.
Understanding the Tumbling Blocks Design
The Tumbling Blocks quilt is a classic geometric pattern based on a simple optical illusion. Three diamond-shaped pieces are arranged to look like the three visible faces of a cube.
Each cube uses three different fabric values:
- Light fabrics: These create the top-facing surfaces of the cubes.
- Medium fabrics: These form one side of each cube.
- Dark fabrics: These form the opposite side and provide depth.
The contrast between these three values makes the blocks appear three-dimensional.
For a look similar to the inspiration photo, use ivory or cream for the light diamonds, colorful prints for the medium diamonds, and darker or more saturated fabrics for the remaining diamonds. You can also use a mixture of floral, plaid, polka-dot, striped, and geometric prints to create a traditional scrappy appearance.
Important: This is a practical adaptation inspired by the photograph, not a verified copy of the original maker’s pattern. The dimensions below are proposed working measurements for a small-diamond tumbling-block design.
Finished Quilt Size
This tutorial uses a repeating tumbling-block arrangement that can be expanded or reduced to suit your needs.
- Approximate finished size: 60 × 72 inches (152 × 183 cm)
- Approximate block arrangement: 10 blocks across and 12 blocks down
- Basic unit: Three diamond shapes per cube
- Suggested finished diamond height: 4 inches (10.2 cm)
- Suggested finished diamond width: approximately 2⅓ inches (5.9 cm)
- Suggested seam allowance: ¼ inch (6 mm)
The final dimensions depend on the exact diamond template, the arrangement of the blocks, and the size of the border. Make a small test section before cutting all your fabric.
Materials and Supplies
Gather the following materials and tools before beginning.
- Assorted quilting cotton scraps
- Ivory, white, or cream cotton for the light cube faces
- Medium-value prints for the second cube face
- Darker prints for the third cube face
- Coordinating fabric for the backing
- Quilt batting
- Binding fabric
- Rotary cutter and cutting mat
- Quilting ruler
- 60-degree quilting ruler or a diamond template
- Sewing machine
- Neutral sewing thread
- Fabric scissors
- Pins or quilting clips
- Iron and ironing board
- Quilting safety pins or basting spray
- Walking foot or free-motion quilting foot
Quilting cotton is recommended because it is easy to handle, presses well, and is suitable for precise geometric piecing.
Step 1: Choose a Balanced Color Palette
The three-dimensional illusion depends on the relationship between light, medium, and dark fabrics.
Before cutting, sort your fabric scraps into three groups.
Group 1: Light Fabrics
Choose white, ivory, cream, pale beige, or very light prints. These fabrics will represent the top-facing planes of the cubes.
For a vintage look, use a mixture of small floral prints, delicate stripes, and subtle geometric patterns on cream backgrounds.
Group 2: Medium Fabrics
Select fabrics with medium visual value, such as muted red, turquoise, sage green, lavender, pale blue, and warm yellow.
These fabrics should be noticeably darker than the light fabrics but lighter than the darkest group.
Group 3: Dark Fabrics
Choose navy blue, burgundy, deep green, brown, charcoal, and other saturated prints.
Dark fabrics create the shadows that make the cubes appear to have depth.
Color tip: You do not have to use the same color for every face of every cube. The key is to maintain the difference between light, medium, and dark values. A consistent value structure will preserve the three-dimensional effect even when the prints vary.
Step 2: Make a Diamond Template
A diamond template is essential because every piece must have the same shape for the cubes to fit together accurately.
For this version, use a diamond with:
- A finished vertical height of 4 inches
- A finished horizontal width of approximately 2⅓ inches
- Two 60-degree corners and two 120-degree corners
The template should be a symmetrical rhombus, with all four sides equal in length.
How to Draw the Template
- Draw a vertical line measuring 4 inches.
- Mark the top and bottom endpoints.
- Using a 60-degree angle, draw two equal sloping sides from the endpoints.
- Complete the rhombus by connecting the remaining corners.
- Check that the opposite sides are parallel and that the shape is symmetrical.
- Add a ¼-inch seam allowance around all four sides to create the cutting template.
The finished dimensions describe the shape after the seams are sewn. The cutting template must include the seam allowance.
Alternatively, use a 60-degree quilting ruler or a commercial tumbling-block template with clearly marked seam allowances.
Accuracy tip: Test the template with three scrap diamonds before cutting your main fabrics. Sew the pieces together and check that the cube faces meet without gaps or stretching.
Step 3: Calculate and Cut the Fabric Pieces
For a quilt with approximately 120 visible cubes, each cube requires three diamond faces. This gives a starting estimate of 360 diamond pieces.
The exact number of pieces needed for a complete tessellated quilt depends on the edge arrangement, because the final rows and columns must be finished with partial shapes or a border.
For planning purposes, prepare approximately:
- 120 light diamonds
- 120 medium-value diamonds
- 120 dark-value diamonds
Cut a few extra diamonds in each color group to allow for mistakes and to make the layout easier to balance.
Cutting the Diamonds
- Press your fabric scraps so they lie flat.
- Place the fabric on a cutting mat.
- Position the template carefully, following the grain direction where practical.
- Cut around the template with a rotary cutter.
- Repeat until you have enough diamonds in each color group.
- Keep the pieces sorted by value in separate piles or labeled containers.
If using a directional print, decide whether you want the pattern to follow a consistent direction or vary from block to block.
Do not stretch the diagonal edges while handling the cut pieces. These edges can distort more easily than edges cut along the straight grain.
Step 4: Arrange the Three Faces of Each Cube
Before sewing, arrange three diamonds to create one cube motif.
- Place one light diamond at the top of the motif.
- Position one medium diamond directly below and to one side of the light diamond.
- Place one dark diamond on the opposite side to complete the cube.
- Check that the three diamonds meet at a central point.
- Confirm that the light, medium, and dark faces create the illusion of a cube viewed from above.
Think of the light diamond as the upper face and the medium and dark diamonds as the two sides.
Make several test arrangements using different prints. Once you understand how the three pieces fit together, repeat the same geometric relationship with your other fabric combinations.
Important: Do not sew all the pieces into isolated three-diamond units without first testing the repeating layout. A Tumbling Blocks quilt is a tessellated design, so the individual faces must align with neighboring cubes across the entire quilt.
Step 5: Sew the Diamond Pieces Together
The ¼-inch seam allowance is especially important when working with diamonds because the corners must meet precisely.
- Place the first two diamonds right sides together.
- Align the edges carefully and pin near the points.
- Sew with a consistent ¼-inch seam allowance.
- Open the pieces gently and press the seam to one side.
- Add the third diamond to complete the cube motif.
- Match the central intersections carefully before stitching.
- Press the completed unit without pulling the fabric.
When sewing angled pieces, stop at the exact seam intersection when necessary and secure the stitches according to your machine’s settings.
Avoid stretching the bias edges, as this can cause the diamonds to become distorted.
Practice with a small sample until you can produce clean, even intersections.
Step 6: Create a Repeating Tumbling-Block Layout
The most important part of this quilt is the placement of the diamond faces.
The diamonds must form a repeating network of interlocking cubes. Each cube should share its geometric boundaries with neighboring motifs, creating the continuous optical illusion seen in the inspiration photo.
Arrange the First Section
- Lay the first group of light diamonds on your design surface.
- Position the medium diamonds beside them.
- Add the dark diamonds to complete the first series of cubes.
- Continue adding pieces to the right, maintaining the same orientation of the diamond shapes.
- Begin the next row with the appropriate offset so that the sloping edges align with the row above.
- Repeat until the pattern extends across the desired width.
The design should look like a field of connected cubes rather than separate squares with gaps between them.
Check the Visual Effect
Step back from your layout and inspect the pattern.
- Light faces should remain visually distinct from the medium and dark faces.
- The side faces should form consistent diagonal lines.
- Neighboring cubes should appear to interlock.
- Similar fabric prints should be distributed throughout the quilt rather than concentrated in one area.
Take a photograph of your layout before sewing so you can refer to it during assembly.
Beginner tip: Assemble a small sample section first. The three-dimensional effect becomes much easier to understand once several rows are placed together.
Step 7: Sew the Rows
Once you are satisfied with the arrangement, organize the pieces into diagonal rows according to your chosen diamond layout.
- Label the rows in order.
- Keep each row arranged in the same sequence as the design wall.
- Sew the diamonds together along their adjoining edges.
- Maintain the same ¼-inch seam allowance throughout.
- Press each seam carefully, keeping the diamond points flat.
- Check the row against your reference photograph before moving to the next one.
Because the pieces are angled, some row ends may form pointed or uneven edges. This is normal for a diamond-based quilt.
Do not trim the points prematurely. Wait until the adjoining rows have been sewn and the overall design is established.
Step 8: Join the Rows to Form the Quilt Top
With the individual rows prepared, begin assembling the full quilt top.
- Place the first two rows right sides together.
- Align the diamond intersections and pin the matching points.
- Sew along the adjoining edges using the ¼-inch seam allowance.
- Press the seams gently, avoiding distortion.
- Add the next row and repeat the process.
- Continue until all the rows are joined.
At every intersection, check that the seams meet at the intended points.
If the intersections are slightly bulky, press the seams in alternating directions where possible. You may also press selected seams open if that helps reduce bulk.
After joining several rows, lay the quilt top flat to check for ripples or stretched edges. Correct small alignment problems before adding more rows.
Step 9: Square the Quilt Top
When the main patchwork is assembled, inspect the entire quilt top.
- Lay the quilt on a large flat surface.
- Check that the central area lies flat.
- Identify any uneven edges or excess fabric.
- Use a ruler and rotary cutter to trim only where necessary.
- Preserve the points of the diamonds wherever possible.
Because the pattern is based on angled pieces, the outer edges may not form a perfect rectangle immediately. A border can help create a neat finished outline.
Avoid cutting into the cube faces simply to make the edges look straight. Plan the border around the existing layout instead.
Step 10: Add an Optional Border
The inspiration photo has a narrow, light-colored edge. You can reproduce a similar finish by adding a slim border in white, cream, or a coordinating print.
- Measure the quilt top through the center in both directions.
- Cut two border strips to the measured length for the sides.
- Sew the strips to the left and right edges using a ¼-inch seam allowance.
- Press the seams toward the border.
- Measure the new width across the quilt.
- Cut two additional strips to fit the top and bottom.
- Sew the remaining borders in place.
- Press and inspect the corners.
For a narrow border, cut strips 1½ inches wide for a finished width of approximately 1 inch.
If the quilt has irregular diamond points along its edges, use a planned edge treatment or carefully fitted border rather than trimming away large portions of the pattern.
Step 11: Prepare the Quilt Sandwich
The quilt sandwich consists of the finished quilt top, batting, and backing fabric.
- Press the quilt top and remove loose threads.
- Place the backing fabric on a clean surface with the wrong side facing up.
- Smooth the batting over the backing.
- Position the quilt top over the batting with the right side facing up.
- Smooth the three layers from the center outward.
- Baste the layers together using safety pins or basting spray.
The backing and batting should extend several inches beyond every edge of the quilt top.
For a quilt of this size, allowing at least 4 inches of extra fabric on each side provides useful room for shifting during quilting.
Check the batting manufacturer’s instructions for the recommended spacing between quilting lines.
Step 12: Quilt the Layers Together
Choose a quilting design that complements the three-dimensional geometric pattern.
Option A: Straight-Line Quilting
Straight lines create a clean, modern finish. Quilt parallel lines across the diamonds or follow selected diagonal directions in the pattern.
Option B: Echo Quilting
Stitch around the cube faces, following the geometric outlines. This emphasizes the three-dimensional illusion without introducing a competing design.
Option C: Stitch in the Ditch
Quilt along selected seams between the diamond pieces. This is a subtle way to secure the layers while allowing the patchwork design to remain the main focus.
Option D: Free-Motion Quilting
Use a free-motion foot to add small loops, swirls, or other decorative motifs. A simple design is often best when the quilt contains many different prints.
Start quilting near the center and work outward toward the edges to reduce the risk of wrinkles and puckering.
Use a walking foot if you prefer straight-line quilting and want the layers to feed evenly through the machine.
Step 13: Trim the Quilt Edges
After quilting, place the quilt on a large flat surface.
- Smooth the quilt without stretching it.
- Trim the excess batting and backing fabric.
- Use a ruler to create the planned outer shape.
- Check that the corners and edges are consistent.
- Make sure the binding will cover all the raw edges securely.
If the quilt top has a narrow border, trim carefully so that the border remains even.
Step 14: Prepare and Attach the Binding
Binding protects the raw edges and gives the quilt a polished finish.
- Cut binding strips 2½ inches wide.
- Join the strips with diagonal seams to create one continuous length.
- Fold the strip in half lengthwise, wrong sides together, and press.
- Align the raw edges of the binding with the raw edge of the quilt.
- Sew the binding to the front using a ¼-inch seam allowance.
- Fold the binding around the edge to the back.
- Hand-stitch the folded edge in place or machine-stitch it for a quicker finish.
- Form neat mitered corners as you work around the quilt.
Choose a neutral binding for a subtle finish or a darker fabric to frame the colorful diamonds.
Step 15: Final Pressing and Care
Once the binding is complete, inspect the quilt for loose threads, missed stitches, and uneven edges.
Press gently using a temperature suitable for your fabrics.
If you plan to wash the quilt, follow the care instructions for the fabrics and batting. Cotton quilts may develop a soft, crinkled texture after washing, which adds to their traditional handmade appearance.
Allow the quilt to dry thoroughly before storing it.
Your Tumbling Blocks quilt is now ready to display, use, or give as a handmade gift.
Tips for Achieving a Realistic 3D Effect
Maintain Strong Value Contrast
The three faces of each cube should be easy to distinguish. If all three fabrics are similar in brightness, the optical illusion will become weaker.
Use Prints Carefully
Small-scale prints work especially well because the diamond shapes remain clear. Large motifs can be beautiful, but they may distract from the geometric design.
Be Precise With the Seam Allowance
Even small differences in seam allowance can shift the points of the diamonds. Use a consistent ¼-inch seam and test your technique before assembling the entire quilt.
Avoid Stretching the Diamond Edges
The angled edges can distort during handling. Pin carefully and guide the fabric gently through the machine.
Plan the Layout Before Sewing
The three-dimensional effect depends on consistent orientation and value placement. A design wall or flat layout surface is extremely helpful.
Keep the Background Consistent
Cream, ivory, and pale neutral fabrics make excellent light cube faces. Using a consistent light value helps unify the scrappy prints.
Frequently Asked Questions
What is a Tumbling Blocks quilt?
A Tumbling Blocks quilt is a geometric patchwork design that uses diamond-shaped pieces arranged to resemble interlocking three-dimensional cubes.
Is this quilt suitable for beginners?
It is possible for a beginner to make this quilt, but accurate cutting, consistent seam allowances, and careful matching of points are important. Practicing with a small sample is strongly recommended.
Can I use fabric scraps for this pattern?
Yes. This is an excellent project for leftover quilting cotton. Sort the scraps into light, medium, and dark groups before cutting to maintain the three-dimensional effect.
Why do the cubes look three-dimensional?
The illusion comes from arranging three diamond faces with different visual values. Light, medium, and dark fabrics suggest different planes and create the appearance of depth.
Do I need a special ruler?
A 60-degree ruler or a carefully made diamond template can help produce consistent shapes. Whichever tool you use, make sure the finished diamond geometry and seam allowances are accurate.
Can I make a larger quilt?
Yes. Extend the repeating diamond layout to add more rows and columns. Calculate the additional fabric requirements before cutting and plan how the outer edges will be finished.
What fabric works best for this quilt?
Quilting cotton is an excellent choice because it is stable, easy to press, and available in a wide variety of prints and colors.
Final Thoughts
The Tumbling Blocks quilt is a beautiful example of how simple geometric shapes can create an extraordinary visual effect. By combining light, medium, and dark fabrics, you can transform a collection of fabric scraps into a quilt that appears to be filled with three-dimensional cubes.
Take your time when cutting the diamonds, arrange the fabrics thoughtfully, and pay close attention to the points where the pieces meet. The result is a colorful, vintage-inspired quilt that celebrates creativity, precision, and the timeless art of patchwork.