A Complete Step-by-Step Quilting Tutorial
Create a beautiful, colorful patchwork quilt using fabric scraps, half-square triangle blocks, and contrasting sashing. This quilt is perfect for quilters who love combining different prints, colors, and textures into a one-of-a-kind design.
The finished quilt features small geometric blocks made from four half-square triangles, framed by gray sashing that gives the busy patchwork a clean, organized appearance.
This pattern is ideal for using leftover quilting cotton, jelly-roll-style scraps, and small pieces from previous sewing projects.
Finished Quilt Size
- Approximate finished size: 72 × 86 inches (183 × 218 cm)
- Block layout: 10 blocks across and 12 blocks down
- Total blocks: 120
- Finished block size: 6 × 6 inches (15.2 × 15.2 cm)
- Finished sashing width: 1 inch (2.5 cm)
- Finished outer border width: 1.5 inches (3.8 cm)
All measurements in this tutorial include a ¼-inch seam allowance unless otherwise stated.
Materials and Supplies
Gather the following materials before starting your quilt.
- Assorted quilting cotton scraps in a variety of colors and prints
- Gray quilting cotton for the sashing and outer border
- Coordinating fabric for the quilt backing
- Cotton or polyester quilt batting
- Binding fabric
- Rotary cutter and cutting mat
- Quilting ruler with a 45-degree angle line
- Sewing machine
- Neutral or coordinating sewing thread
- Fabric scissors
- Pins or quilting clips
- Iron and ironing board
- Quilting safety pins or basting spray
- Walking foot or free-motion quilting foot, depending on your quilting method
Choosing Your Fabrics
The beauty of this quilt comes from its variety. Combine florals, geometric prints, polka dots, stripes, solids, and novelty fabrics.
Choose a mixture of light, medium, and dark fabrics to create contrast between the triangles. Red, turquoise, blue, green, yellow, pink, purple, black, cream, and beige work beautifully together.
Gray sashing is recommended because it separates the colorful blocks without competing with the patterns.
Prewash your fabrics if desired, especially if you are mixing fabrics with different shrinkage characteristics. Press them flat before cutting.
Cutting Instructions
1. Cut the Scrappy Triangle Fabric
You will need 480 fabric squares measuring 4 × 4 inches (10.2 × 10.2 cm).
These squares will be paired to create the half-square triangle units.
For a balanced scrappy appearance, select a mixture of light and dark fabrics. You can use two different prints for each pair or combine a print with a solid fabric.
Each pair of squares will produce two half-square triangle units.
Important: The quantities above allow you to make the 480 units required for 120 blocks. Cutting a few extra squares is recommended in case of mistakes.
2. Cut the Gray Sashing
The sashing separates the blocks and creates the quilt’s distinctive grid.
Cut gray fabric strips measuring 1½ inches wide.
You will need enough strips to create:
- Nine vertical sashing strips between the ten blocks in each row.
- Eleven horizontal sashing strips between the twelve rows of blocks.
For easier assembly, you can cut shorter strips for the individual blocks and rows instead of handling very long strips of fabric.
3. Cut the Outer Border
Cut gray fabric strips measuring 2 inches wide for the outer border.
Measure the completed quilt top before cutting the border pieces to their final lengths. This helps prevent wavy edges and keeps the quilt square.
Step 1: Make the Half-Square Triangle Units
Half-square triangles, commonly called HSTs, are square units made from two triangles of contrasting fabric.
- Place two 4-inch fabric squares right sides together.
- Draw a diagonal line from one corner to the opposite corner on the wrong side of the top square.
- Sew a seam ¼ inch away from the drawn line on each side.
- Cut directly along the drawn diagonal line.
- Open the two resulting units and press the seams toward the darker fabric, or press them open if you prefer to reduce bulk.
- Trim each unit to exactly 3½ × 3½ inches.
You should now have two half-square triangle units from each pair of squares.
Repeat this process until you have at least 480 trimmed HST units.
Accuracy tip: Trim every unit carefully. Consistent measurements will make it much easier to assemble the four-patch blocks and keep the finished quilt flat.
Step 2: Arrange the Four-Patch Blocks
Each finished block is made from four half-square triangle units arranged in a two-by-two layout.
- Select four HST units with colors and prints that complement one another.
- Place two units in the top row and two in the bottom row.
- Rotate the units to create different geometric effects, such as pinwheels, diamonds, zigzags, chevrons, and hourglass-style designs.
- Check that the triangle points meet neatly at the center of the block.
- Continue arranging units until you have 120 different four-patch blocks.
Do not worry about making every block identical. The variety of arrangements is what gives this quilt its scrappy charm.
For the most interesting overall design, alternate dark blocks with lighter blocks and spread bright colors throughout the quilt.
Step 3: Sew the Four-Patch Blocks
Once you are happy with each arrangement, sew the four HST units together.
- Place the two top units right sides together.
- Sew them along the adjoining edge using a ¼-inch seam allowance.
- Repeat with the two bottom units.
- Press the seams in opposite directions where practical to help the seams nest.
- Place the two completed rows right sides together, matching the center seam.
- Pin the center intersection and sew the rows together.
- Press the completed block carefully.
Each block should measure approximately 6½ × 6½ inches before being joined to the other blocks, giving a finished size of 6 × 6 inches.
Repeat for all 120 blocks.
Step 4: Arrange the Quilt Layout
Lay out all 120 blocks on a large flat surface, design wall, or clean floor.
Arrange them in 12 rows of 10 blocks each.
Before sewing, step back and look at the overall color distribution. Move blocks around until the bright colors, darker prints, and lighter fabrics are distributed evenly.
Avoid placing too many blocks with similar colors or identical patterns directly beside one another unless you want a more coordinated effect.
Take a photograph of the final layout so you can refer to it during assembly.
Step 5: Add the Vertical Sashing
The gray sashing frames each block and creates the grid visible in the finished quilt.
For this construction method, the blocks will be joined with 1½-inch-wide gray strips, which finish at 1 inch wide.
- Select the ten blocks for the first row.
- Sew a 1½-inch-wide gray strip between the first and second blocks.
- Continue adding blocks and sashing strips until the row contains ten blocks and nine sashing strips.
- Press the seams toward the gray sashing where possible.
- Repeat for all twelve rows.
Keep the strip edges aligned with the block edges. Avoid stretching the gray fabric while sewing.
Step 6: Sew the Horizontal Sashing
Now join the completed block rows with horizontal gray sashing.
- Measure the width of the assembled block rows.
- Cut gray strips 1½ inches wide to the measured length.
- Place one strip along the bottom edge of the first row, right sides together.
- Sew using a ¼-inch seam allowance and press the seam toward the sashing.
- Place the second row against the opposite edge of the strip and sew.
- Repeat until all twelve rows have been joined with eleven horizontal sashing strips.
Match the vertical sashing intersections between adjacent rows. Pin these intersections before sewing to help keep the grid straight.
If your fabric strips need to be pieced to achieve the required length, join them with diagonal seams to reduce bulk.
Step 7: Add the Outer Border
A gray outer border gives the quilt a neat frame and helps finish the patchwork design.
- Measure the quilt top through the center from top to bottom.
- Cut two border strips to that measurement.
- Sew one strip to each side of the quilt top.
- Press the seams toward the border.
- Measure across the quilt from side to side, including the newly attached borders.
- Cut two additional strips to that measurement.
- Sew one strip to the top and one to the bottom.
- Press carefully and check that the quilt top lies flat.
For this version, use 2-inch-wide strips for a finished border approximately 1½ inches wide.
The quilt top should now measure approximately 72 × 86 inches, depending on your sewing accuracy and any adjustments made during assembly.
Step 8: Prepare the Quilt Sandwich
The quilt sandwich consists of three layers: the quilt top, batting, and backing fabric.
- Press the quilt top and inspect all seams.
- Remove loose threads and check for any open seams.
- Lay the backing fabric on a clean, flat surface with the wrong side facing up.
- Smooth the batting over the backing.
- Place the quilt top over the batting with the right side facing up.
- Smooth all three layers to remove wrinkles.
- Baste the layers together using safety pins or quilting spray.
The backing and batting should extend several inches beyond all four edges of the quilt top to allow for shifting during quilting.
For a quilt this size, a backing and batting allowance of at least 4 inches on each side is practical.
Step 9: Quilt the Layers Together
Choose a quilting design that complements the geometric patchwork.
Option A: Stitch in the Ditch
Quilt along the seams between the blocks and the gray sashing. This method emphasizes the grid and keeps the colorful prints as the main focus.
Option B: Straight-Line Quilting
Sew straight lines through the blocks, either diagonally across the squares or parallel to the block seams. This creates a clean, modern finish.
Option C: Free-Motion Quilting
Use a free-motion foot to stitch loops, swirls, leaves, or other decorative designs across the quilt.
Whichever method you choose, start near the center and work outward toward the edges to minimize puckering.
Check the batting manufacturer’s instructions for the maximum recommended distance between quilting lines.
Step 10: Trim the Quilt
After quilting, place the quilt on a large flat surface.
- Smooth the quilt without stretching it.
- Use a rotary cutter and ruler to trim away the excess batting and backing.
- Square the corners and ensure the edges are straight.
- Check that all three layers are even along the perimeter.
Do not trim too close to the edge of the quilt top before confirming that the backing and batting are securely quilted.
Step 11: Make and Attach the Binding
Binding covers the raw edges and provides a durable, professional finish.
- Cut binding strips 2½ inches wide from your chosen fabric.
- Join the strips with diagonal seams to create one long continuous strip.
- Fold the strip in half lengthwise with the wrong sides together and press.
- Align the raw edges of the binding with the raw edge of the quilt.
- Sew the binding to the front of the quilt using a ¼-inch seam allowance.
- Fold the binding around the raw edge to the back.
- Hand-stitch the folded edge in place, or machine-stitch it for a faster finish.
- Fold and secure the corners neatly to create clean mitered edges.
Once the binding is complete, inspect the quilt for loose threads and uneven stitches.
Step 12: Final Pressing and Finishing
Give the finished quilt a gentle press, following the care recommendations for your fabrics and batting.
If desired, wash the quilt according to the fabric care instructions. Cotton quilts may develop a soft, crinkled texture after washing, which adds to their handmade charm.
Allow the quilt to dry thoroughly before folding or storing it.
Your scrappy half-square triangle quilt is now complete!
Helpful Tips for a Beautiful Scrappy Quilt
- Use consistent seam allowances. A reliable ¼-inch seam allowance helps the blocks align correctly.
- Trim HST units carefully. Accurate squares make a noticeable difference when assembling a large quilt.
- Balance the colors. Spread bright and dark fabrics throughout the quilt for an even visual effect.
- Press rather than drag the iron. This helps prevent stretching the bias edges of the triangle units.
- Test your layout before sewing. Rearranging blocks is much easier before the rows are assembled.
- Choose a simple quilting design. Straight-line quilting or stitching in the ditch allows the colorful patchwork to remain the star of the project.
- Keep extra scraps. Additional HST units can be used to replace any blocks that do not fit the final layout.
Frequently Asked Questions
Is this quilt suitable for beginners?
Yes. Beginners who are comfortable sewing straight seams can make this quilt. The most important skills are accurate cutting, consistent seam allowances, and careful pressing.
Can I use leftover fabric scraps?
Absolutely. This is an excellent scrap-busting project. Small cotton pieces are perfect for the triangle units, making it a practical way to use fabric left over from other quilts.
Can I change the finished quilt size?
Yes. Add or remove block columns and rows to change the overall dimensions. Remember to adjust the amount of sashing, border fabric, batting, and backing accordingly.
Do all the blocks need to be different?
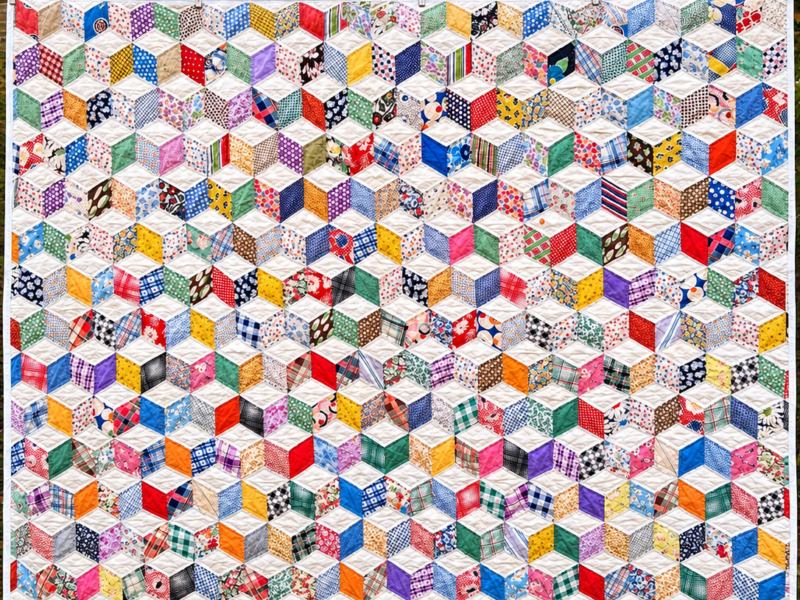
No. You can repeat block designs or use a consistent color palette. However, varied prints and triangle arrangements create the lively patchwork effect shown in the inspiration photo.
What is the purpose of the gray sashing?
The sashing separates the blocks, defines the quilt’s grid, and gives the many different fabric prints a more cohesive appearance.
Final Thoughts
This scrappy half-square triangle quilt is a wonderful way to turn a collection of colorful fabric remnants into a striking handmade heirloom. The combination of geometric blocks, varied prints, and gray sashing creates a design that is both playful and structured.
Make each block unique, experiment with color placement, and enjoy the creative process of transforming small scraps into a beautiful, generously sized quilt.